Sunday 28 October 2012

lesson 5 high to low poly


Open up the create you made in the previous lesson and go into the uv editor, then break the connections between the different sides and ,move them around so they don’t touch, this will avoid seem errors. (use the pack uv ) this will pack them the most effectively.

Convert to editable poly to bake information.
Clone create and rename it high poly create then select the edges by pressing f4


 Click and drag over all of the edges and then deselect all of the corner edges by holding down alt and click on them to make the edges go white.
Click the chamfer button and by eye increase the size of the chamfer and the amount of faces. And use auto smooth at around 20% to round off the edges.
Use the connect tool to increase the level of sub divisions to around 30 000.


 Go into the vertex mode and select soft selections from here you can change the pinch and fall off to make bullet hole shaped dents, you can also make dents by going into freeform selection tab on the left top side of the screen and select the paint deformer.
Unselect the isolate selection and select the low poly and go into modifier list and choose projection.  Once you are in projection go to reference geometry and select high poly crate and click add, go down to the tab that says cage and click shaded to show the detail.
Once you have done this go the tab that’s called cage and increase the amount until the blue lines are higher than the bumps in the high poly.
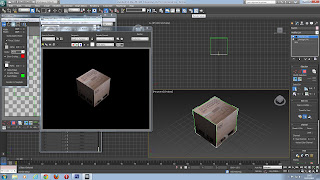
Go into the rendering drop down and click render to texture select enable projection and then add your low poly create into the output, in the element commons select normal map and increase the size to max. press render if there is red increase the push size.
For the lighting map delete the normal map and change it to a shadows map, go into the render options and under lighting change it from no light to tracer light.


self study 3 making SNES controller in Maya


Wednesday 17 October 2012

lesson 4 model from reference


  • ·         Created a plane in the front view 48 width by 60 height and then click the shaded option in the wire frame tab (top left of the screen.

·         
  • ·         Press g to get rid of the grid then open the material editor and open the shield image as a defused map, then drag it onto the image.
  • ·         Next we want to freeze the plane so right click the plane and go into object properties, tick the box that says freeze and untick the box that says frozen objects in grey.
  • ·         Create another plane with 4 widths and 6 length right click and go into object properties again and select see through.
  • ·         Turn plane into editable poly and select vertex
  • ·         Using the scale tool scale the verts until they match up with the image starting from the middle.

·         
·         Use the move tool to fix some of the verts that didn’t line up correctly
  • ·         Select by boarder and click on the far outer edge then hold shift and drag back to give the object some depth, make it no see through in the same way you made it see through.

·         
  • ·         Go into the modifier tab and select fD 4 4 4 which gives us a modifier control, go into the editable tab and select the 4 central control points and move them to give some curvature.

·         
  • ·         Convert back into editable poly and then apply a uvw map, flatten mapping in the mapping option.
  • ·         Control I to invert the selection and then click unfold mapping to get the other polygons from the shields boarder.
  • ·         Then as a previous lesson render the image as a map and save it as a jpeg, open in Photoshop
  • ·         Texture the shield and skirting and then save as a Photoshop file.
  • ·         Create a bump map, specular map and color map
  • ·         Use levels to create the spec and bump maps and use the color option in the moderfier list to create the color map
  • ·         Apply the maps the same way you added the diffused map but in there appropriate sections.


·         

Monday 15 October 2012

self study2

in this self study i transfers the texturing skills that i learned over the last 3 years in maya over to max.

time spent: 30 min

tools used


  • material editor 

self study 1

in this self study lesson i practised using the ring and connect tool to make the mesh seem more smooth, i also learned how to effect the sharpness of the corners by editing the cubes parameters.


  1. learned to use ring and connect 
  2. learned to adjust edges of cube
  3. learned how to use turbosmooth 
  4. practised adusting shadow paramaters 


time spent 1 hour 30 

tools use

  • insert 
  • extude 
  • turbosmooth 

Wednesday 10 October 2012

lesson 3 making crate


  • ·         Make cube
  • ·         Convert to editable poly
  • ·         Ctrl A to select all
  • ·         Right click inset options
  • ·         Inset by 4
  • ·         Right click extrude
  • ·         Change from group to by polygon
  • ·         Extrude by – 4
  • ·         Unselect editable poly mode
  • ·         Go into modifier list
  • ·         Unwrap uvw
  • ·         Ctrl a select all
  • ·         Mapping flatten mapping
  • ·         Select edge
  • ·         Right click stitch selected 
  • ·         Continue for all sides
  • ·         Select outer box by poly right click break
  • ·         Continue stitching


·         
·         
·        

  • ·         We textured the crates in to different ways
  • ·         First way was to make the uvs into a net
  • ·         The second way was to copy and paste the uvs ontop of each other 
  •        we we textured them in photoshop in the same way we did in the previous lesson 


Monday 8 October 2012

lesson 2 texturing

today in class we learned the basics of texturing in 3ds Max using uvw texture mapping, this is done by selecting the object and unwrapping it so that you have flat net instead of a 3d object.


once we had unwrapped are box we had to preview the net and then save it as a jpeg, once it is saved as a jpeg you can open it in photoshop this is when we can start preparing the uvw map for texturing. the first thing we did was copy the base layer (ctrl + j) and then desatsitise it. once this was done all we had to do was invert it (ctrl + i) and begin adding the ruler lines.
i got the textures off of moodle and began to apply them over the net.

i saved my newly textured to my usb drive so that it wouldn't be deleted if my computer crashed (saved as a photoshop file) once back into 3ds max i applied the texture using the materiel shader editor (M short cut key)
after texture is applied i took a few renders and then added shadows using a target light.