

Open up the create you made in the previous lesson and go into the uv editor, then break the connections between the different sides and ,move them around so they don’t touch, this will avoid seem errors. (use the pack uv ) this will pack them the most effectively.

Convert to editable poly to bake information.
Clone create and rename it high poly create then select the edges by pressing f4


Click the chamfer button and by eye increase the size of the chamfer and the amount of faces. And use auto smooth at around 20% to round off the edges.
Use the connect tool to increase the level of sub divisions to around 30 000.
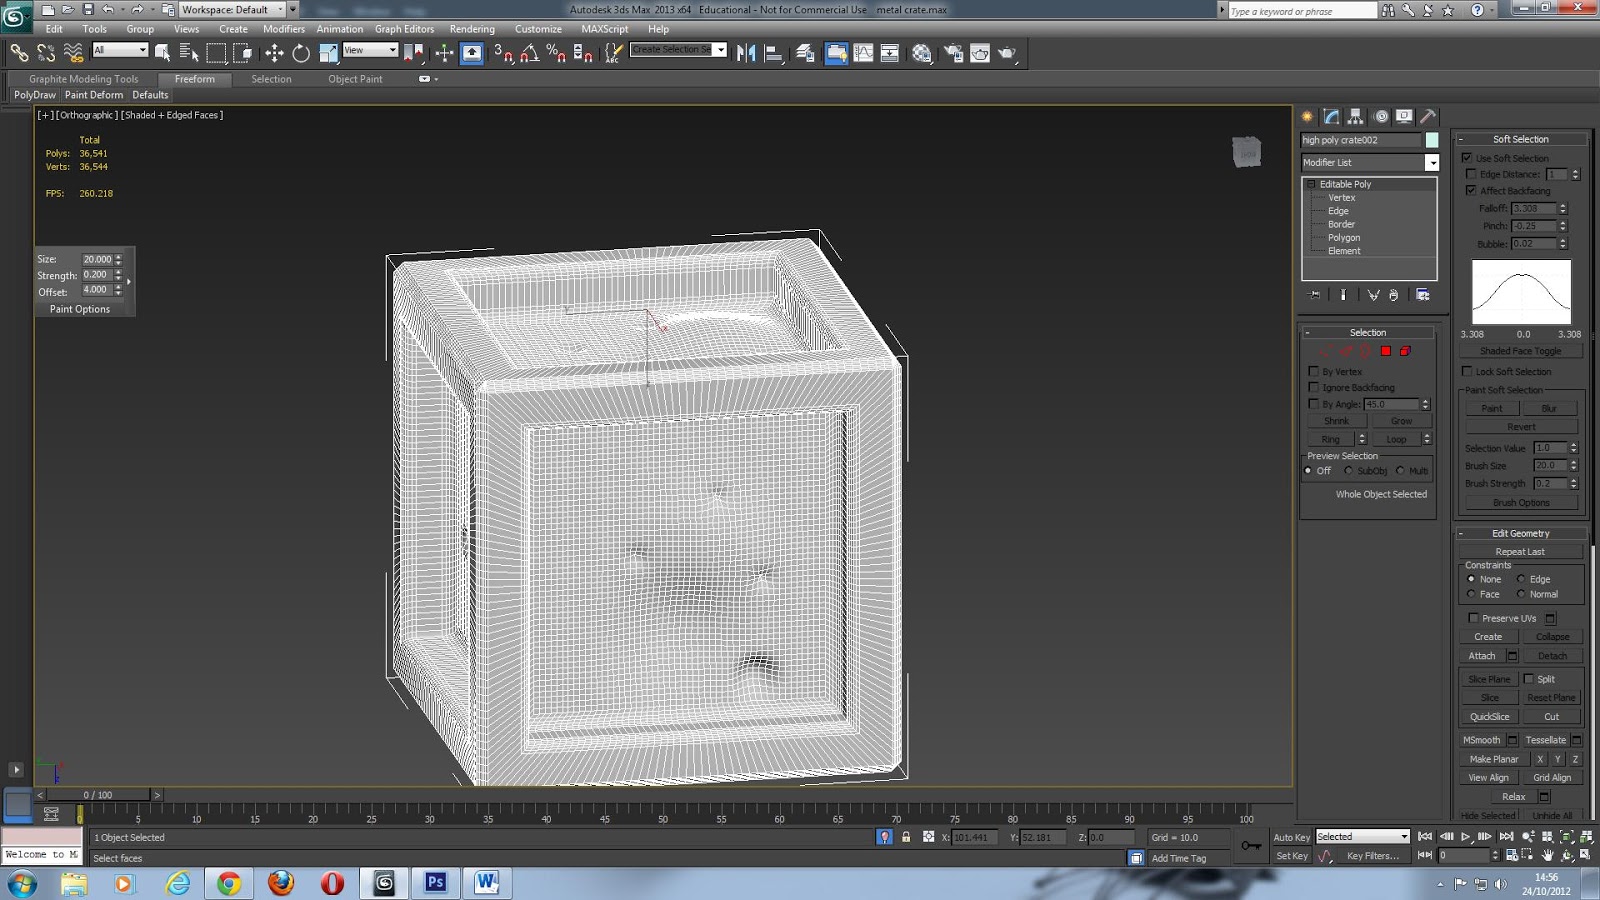
Go into the vertex mode and select soft selections from here you can change the pinch and fall off to make bullet hole shaped dents, you can also make dents by going into freeform selection tab on the left top side of the screen and select the paint deformer.
Unselect the isolate selection and select the low poly and
go into modifier list and choose projection.
Once you are in projection go to reference geometry and select high poly
crate and click add, go down to the tab that says cage and click shaded to show
the detail.
Once you have done this go the tab that’s called cage and
increase the amount until the blue lines are higher than the bumps in the high
poly.
Go into the rendering drop down and click render to texture
select enable projection and then add your low poly create into the output, in
the element commons select normal map and increase the size to max. press
render if there is red increase the push size.
For the lighting map delete the normal map and change it to
a shadows map, go into the render options and under lighting change it from no
light to tracer light.

No comments:
Post a Comment