Monday, 31 December 2012

magnamite

magnamite test render 
 the scene
final render 
goal:
my goal was to create magnamite as realistically as possible changing its style from cartoon to real world graphics. magnamite is a creature off the popular anime pokemon, magnamite is a small steel electric type and i got allot of my information about the pokemon though watching the anime/ looking up reference on the internet.
the model:
the body:
the body was formed from a simple sphere turned on its side and the front faces scaled,moved in slightly and then detached. i gave the front detached faces a glass texture and the rest of the body a stainless steel finish.
magnets:
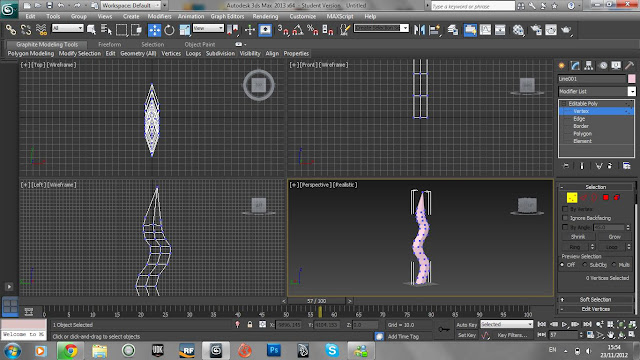
to make the magnets i first took a cube and made it a rectangle by scaling it, then using the connect tool i added a square to one end. after i had made a square at one end i selected the face on top of the square and extruded upwards.
using the mirror tool i mirror the shape to make it symmetrical (welded the verts) finally i added more connects and by moving the verts made the ends rounds/ arch shaped.
screws:
the screw are made by cutting sphere in half and capping the end, i then inset and extruded the long part of the screw and added/extruded connects to give a threaded feel.
the eye:
to put it simply the eye is a sphere with a high resolution texture on it.
the lighting:
the lighting in this scene is a vray sun with a vray sky background, originally i was going to use a v ray standard light with a hdri background image but in the end the image was to dark and grainy for the texture i was using.
changes to model:
as you can see from the test and final render the only difference is one of the magnets has been rotated  180 degrees, this is because when i looked back at the reference image i noticed that the magnets were opposite to the counterpart on the other side.
one change i might make in the future is change the material on the screws to a more polished steel rather than stainless, i also plan to animate this model before the animation unit to make sure my key-framing is as good in max as it is in maya.
reference image:
this is the reference image i used to create the basic scale and lay out of my model.


Friday, 28 December 2012

Thought about how I have progressed over the last 3 months

I have learnt a lot over the last 3 months even though I have had previous experience with 3d packages I did not know anything about 3ds max, to make sure I get a head start I have been watching tutorials on the Internet about basic modelling techniques and render set up.
the first thing I looked 4 what is how to add more geometry to my models, the reason for this is the more points there are on the model the more I have to work with however this does not mean that more points make the modelling any easier because if you have too many points it becomes too complicated.

the second thing I looked for tutorials in is lighting and rendering, after looking around on the Internet I discovered v ray which is known for its realistic looking renders and is used by architects and modellers a like.

Thursday, 27 December 2012

old cracked football

fully rendered image:
the scene set up:
the football:
the ball its self did not start out as a sphere at all it in fact started out as a hedra, this is the tutorial i used to learn the basics of how to create a more complex object such as football with is a circle made up of pentagons and hexagons.
http://www.youtube.com/watch?v=3t3twBfUNOY
the grass:
the grass is a vray fur, to get vray fur first go into the create tab and change the drop down from standard to vray. once in vray select vray fur after selecting the object you wish the grass to be emitted from. at first this fur will look nothing like grass in fact in my case it looked more like flat wood chippings, to change this default appearance go into the modifier tab and change the following stats (this will be different depending on the scale and the type of grass you want) length, bend, gravity and tapper. to give your grass some variation in sizes increase the length in the variation section and most importantly if your object doesn't have many subdivisions set distribution to by area but if your object has a high level of subdivisions have it set to by face.   
the texture is a standard green blinn however i may go back and change this later on for a more detailed bitmap.
bumpmap:
the most important part of the model is its bump map, the bump map is a black and white outline of leather and not just a leather image which has had its color removed, the difference is the outline isnt effected by light that was used to illuminate the leather image.
the light set up: 
the light for this scene is a vray physical sun (a good pointer is to make sure you created it facing the correct way as i spent a good 20 minutes trying to work out why my scene was so dark) the only change i made to the light node was the intensity multiplier which i set to 0.015.
the camera:
 the camera is a vray physical camera with standard setting all at default.
the render settings: 
  • renderer is vray
  • the render size is video hd 
  • all other setting are set to vrays default 


Thursday, 20 December 2012

lock and key Vray (not may object piece)

this is my butterfly key:
to create this key i started out with a cylinder and then extrudes outwards at one end to create the base of the handle, to make the handle its self i took a torus and reduced its segments down to ten so that i could shape it more easily with you having vertexs getting in the way. when i had the basic butterfly shape i began to add more connects so i had more points to work with (this gives the butterfly a more rounded feel)
once the butterfly shape was made i welded it to the base of the key using the weld tool on the vertex.
to create the teeth end of the key i extruding the other end out a few mm of the end and then use the connect tool to split the faces so the lower parts of the teeth.
to round the end i selected the cape and extruded it out four times, delete the end cap and select all the verts around it, i then welded the verts to one point and moved the verts from the three other extrudes up and scaled then accordingly to give the tip a rounded feel.

texture:
the gold texture is a yellow diffuse with the spec at 75 and the gloss at 65, the reflect map is a Vray image.
bumpmap:
the scratches are a simple bump map made from a images of scratches turned black and white to give the scratches more depth.

lighting:


  • standard V ray light


  • hdri image 


renderer:


  • Vray 


Sunday, 16 December 2012

research for kitchin and hallway model


these are reference images i am going to use for modelling my environment in max

to make the plate i will use a cylinder as the base and inset it then extrude the middle to make the indent, after i have made the basic mesh i will use smoothing groups around the edges to give off a rounder smooth feel to the object.

to make this cupboard i will start with a rectangle and mark off the different sections using the connect tool, once i have got the different parts lined up i will go into polygon mode and extrude the lower draw outward as they is no point making a movable draw it its not being interacted with. for the inner section i will extrude the polys inwards while leaving a section spare to make a shelf. 
i will make the doors of the cupboard with a separate poly so that i can animate it later on or make it intractable in a game engine, the rest of the object will be texture and normal maps.


i will make the wine glass in maya as the image plane system makes modelling to a reference easy and the way you can move the vertexs freely makes it more useful for making curved objects. i will start with sphere and cut it in half, i will move the vertexs to they line up with the silo-wet of the glass and then while in face mode extrude all the faces inwards to make the inner part of the glass. finally i will make the bottom of the glass by extruding the bottom faces down and manipulating vertexs into line with the base.
as this model is in maya i will have to export it as a OBJ file before importing it into max.
to make this coat stand i will start with a cylinder in the centre and then shape the rest of the stand around it, to make the legs of the stand i will product one leg using a cylinder and bend it using the vertexs, i will then use the mirror modifier to mirror the object across the axes, after i have mirrored it i will hole shift and rotate to make a copy crossing the other axes.
i am thinking that i will make this drinks cupboard very low poly and not make it interatable with the player, to do this i will only extrude the two window and the central part and do the rest of the detail with textures and normal maps. 


the light switch will be very simple to make and will not take many polys to product, i will start with a rectangle and chamfer the edges and then mold the switch button from another object using reference.
the screws will be part of the texture to save polys.


i will make the outline using the line tool and then extrude the poly outwards, this is a simple model with very little detail as it will not look at allot by the player.
as you can see the plug socket is basicly a flattened square so that is where i will start, i will chamfer the edges to give a rounded finish and use a separate object to make the switch. 


Monday, 3 December 2012

makeing hall and living room day 2

on the seconded day of modelling after i had finished blocking out my environment i decided to start making the more simple low poly models, these models included a bookcase, one book (to be duplicated) and a  plug socket.

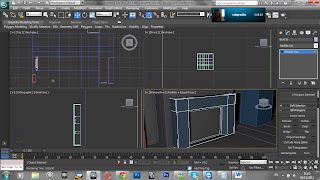
the first object i started working on was the book case, the reason for this is the design is very simple and most of the work will be in the texturing and mapping rather than the modelling. i started with a 112 unit rectangle and converted it to a editable poly, i then began marking out where i wanted the shelves to be using the connect too, once i was happy with the lay out i selected the shelves and the holes between, after i had them selected i extruded them in a little to give the shelves some difration from the rest of the book shelf.

once i was happy with the indent of the shelves i extruded the rest inwards giving the result above.

to make the book i first started with a small rectangle and converted it to editable poly, i selected the two end edges and chamfered them to give the book a rounded spin, once i was happy with the curv of the spin i selected the polygon on the top/ on the front side, and bottom of the book and inset to make pages, this was followed by extruding inwards. 

the insetting and extruding can be seen in the image above.

making the plug socket was the easiest to plan out because of its square shape. i started out with a box that had been shrunk down on its length and converted to editable poly, i then chamfered all the front edges by 3 to give the edges a rounded feel, after i was happy with the roundness of the edges i used to connect tool to mark of where i wanted the holes. 

i extruded the holes inwards and used the chamfer to round them off slightly on the inside. 

the on off switch is a simple rectangle with its edges chamfered, i then rotated the rectangle a little to give the impression that it was a switch in the on position.

the last object i stared today was my fireplace, the only thing i am doing today on its is getting the basic shape using the connect tool and extrude, after converting to editable poly i used the connect tool to line out the two outer supports and the top of the fire place, i then extruded the inner square in before deleting it. 

Saturday, 1 December 2012

making a dagger (vray lighting test) not part of environment


 using techniques used in a previous lesson i made a dagger with a higher level of detail than the sword we made in class. one difference about this dagger is the material on the blade, to make the blade look like steel i added a ray trace and a fall off to the multiple layer material to that it reflect the environment but at the same time didn't give off a mirror effect.
lighting used:

  • Vray third party renderer


tools uses:

  • the line tool
  • basic shapes
  • extrude 
  • smoothing groups 


modeling hall and living room day 1

on the first day of making my model i blocked out the environment from concept art images that i had drawn to figure out how i wanted the room to look, to draw these images i used reference from photos of Victorian styled houses.
the lay out it self is slightly different to my original design for the following reasons, the first reason is scale the table in my drawing is way to big compared to the size of the room so i looked up large dinner table diameters and chose a table that i thought suited the style im going for. the second reason is in my first design i had the living room and kitchen all in one space (open planned living) however i chose to go back to a earlier style with a separate smaller kitchen and larger living space.
even thought the block out if complete the room is quite empty still this is because items like book cases ill make singular then duplicate them this also apples to smaller items like light switches and plates.
tomorrow i will get started on some of the lowest poly objects in the scene such as the book shelves, books and doors.